
Desktop tools like Anthropic's CLI tool, Claude Code, Opencode, etc. have completely changed the way we develop software directly from the terminal. But no matter how clever we are at reading and editing code, artificial intelligence often remains isolated from your company's real ecosystem—closed off without direct access to internal databases, proprietary APIs, or workflow-specific local tools. This is where the Model Context Protocol (MCP) comes in.
Think of MCP as a universal USB-C port for Artificial Intelligence. Created as an open standard, it allows us to create a secure bridge so that these tools can interact with any external tool or data source in real time.
In this short set of words, we'll go from theory to action.
We will learn how to:
- Design and program our first custom MCP server using Python.
- Securely set up the local environment to expose the functions we need.
- Inspect and test MCP server functionalities
- Connect the server directly to our tools to automate complex tasks without leaving the command line.
- Connect AI client apps to the MCP server and use it.
First thoughts
The objective is to create an MCP server that provides some tools, resources and prompts related to world cities and countries information. We will have the following features:
| Name | Type | Description |
|---|---|---|
get_city_details | tool | Gets the details of a city from a country code and the city name. |
get_cities_in_country | tool | Gets a list of the cities of a country |
all_countries | Resource (URI) | Gets the list of all country codes |
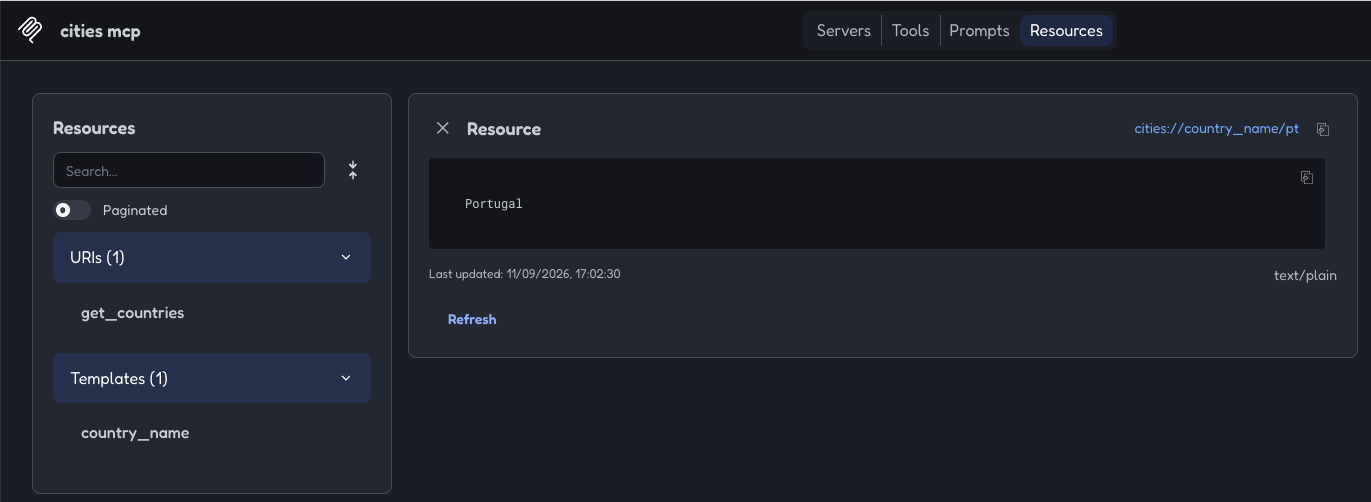
country_name | Resource (template) | Gets the country name from country code |
city_details_verbose | prompt | Gathers detailed information about a city and returns it formatted in an HTML table. |
Then, to create an MCP client to use these functionalities.
Finally, to configure the MCP server on a project so that a desktop tool like Claude Code can use it.
Hands-on
Step 1: First, create a virtual environment and add the dependencies. Run this commands on the folder you want to use.
python3 -m venv .venv
source .venv/bin/activate
pip install "mcp<2" pydantic "mcp[cli]"
This will create a virtual environment and will install 2 python packages needed for the mcp ecosystem:
mcp: for mcp functionalities. At this time, we will limit it to a version lesser than 2pydantic: for data validation and settings management based on Python type hints.mcp[cli]: additional console tools to work with mcp
Note: I am using pip to install the packages, but we could use uv instead.
uv venv .venv
source .venv/bin/activate
uv pip install "mcp<2" pydantic "mcp[cli]"
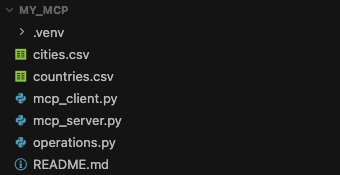
Step 2: Next, lets create the following files:
| File name | Description |
|---|---|
mcp_server.py | MCP server implementation |
mcp_client.py | MCP client implementation to run in shell |
operations.py | MCP server background functions |
README.md | Project “visit card” and project instructions |
Run the following commands.
touch mcp_server.py
touch mcp_client.py
touch operations.py
touch README.md
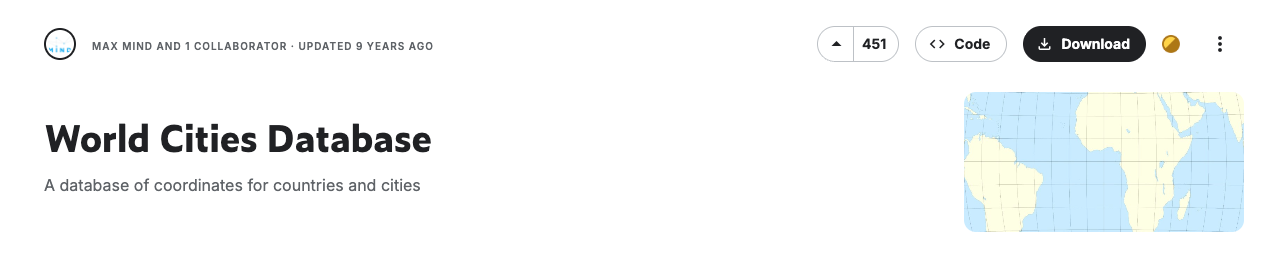
Step 3: Another file we will need is a dataset with world cities information. Lets get it from Kaggle:
World Cities Database: https://www.kaggle.com/datasets/max-mind/world-cities-database
The CSV file has the following format:
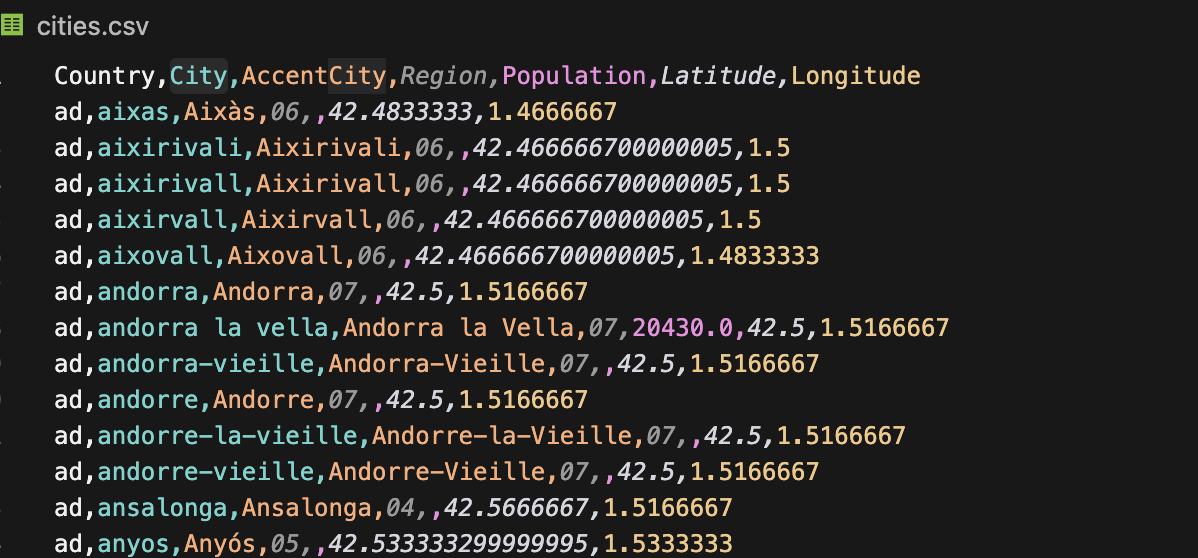
Rename it to cities.csv and add it to our project folder.
Step 4: Add the code to load the data from csv file to the operations.py file.
import csv
import unicodedata
from pathlib import Path

_CITIES_PATH = Path(__file__).with_name("cities.csv")
try:
    with open(_CITIES_PATH, "r") as f:
        _cities = list(csv.DictReader(f))
except Exception as e:
    print(e)
    _cities = []

def _normalize_city_name(city_name: str) -> str:
    normalized_text = unicodedata.normalize('NFD', city_name)
    no_accent_text = "".join(
        c for c in normalized_text if unicodedata.category(c) != 'Mn'
    )
    return no_accent_text
This will expose the dataset as operations.cities and also a function to normalize city name.
Step 5: Create MCP server. Open mcp_server.py and add the following code run the MCP server.
from mcp.server.fastmcp import FastMCP

mcp = FastMCP("cities mcp")

if __name__ == "__main__":
    print("Running MCP server...")
    mcp.run()
Note: At this time the server code is runnable but we don’t have any mcp tool nor a resource or a prompt added to the server and ready to be used.
python mcp_server.py
Now it is time to talk about MCP Inspector. This is an interactive developer tool for testing and debugging MCP servers, in the browser, on the command line, and in the terminal.
More info here: https://modelcontextprotocol.io/docs/2026-07-28/tools/inspector
Even with no MCP tools, resources or prompts we can run MCP Inspector on our MCP server. Run the following command:
mcp dev mcp_server.pyThis will start the MCP Inspector.
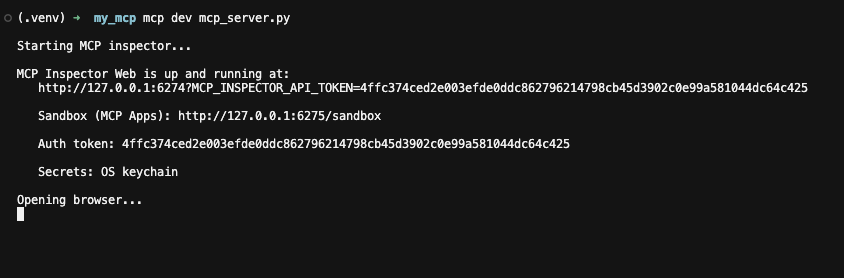
And will open a browser window with the MCP Inspector and our mcp_server ready to be connected to.
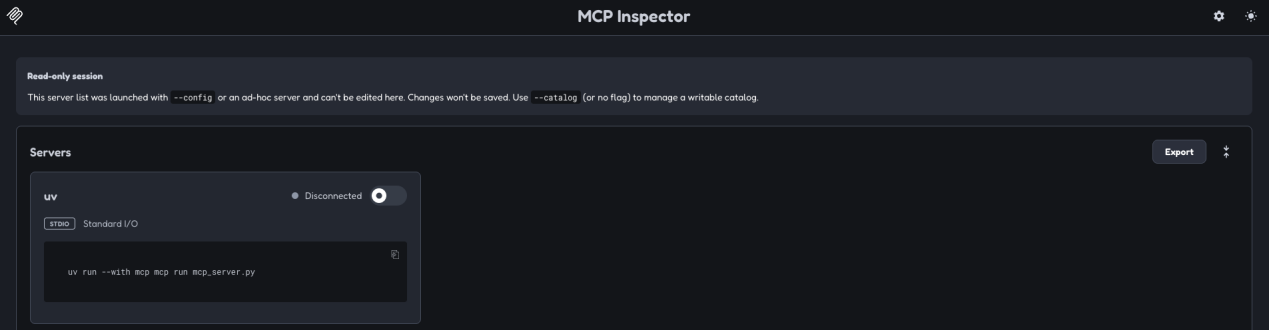
Lets connect to the server.
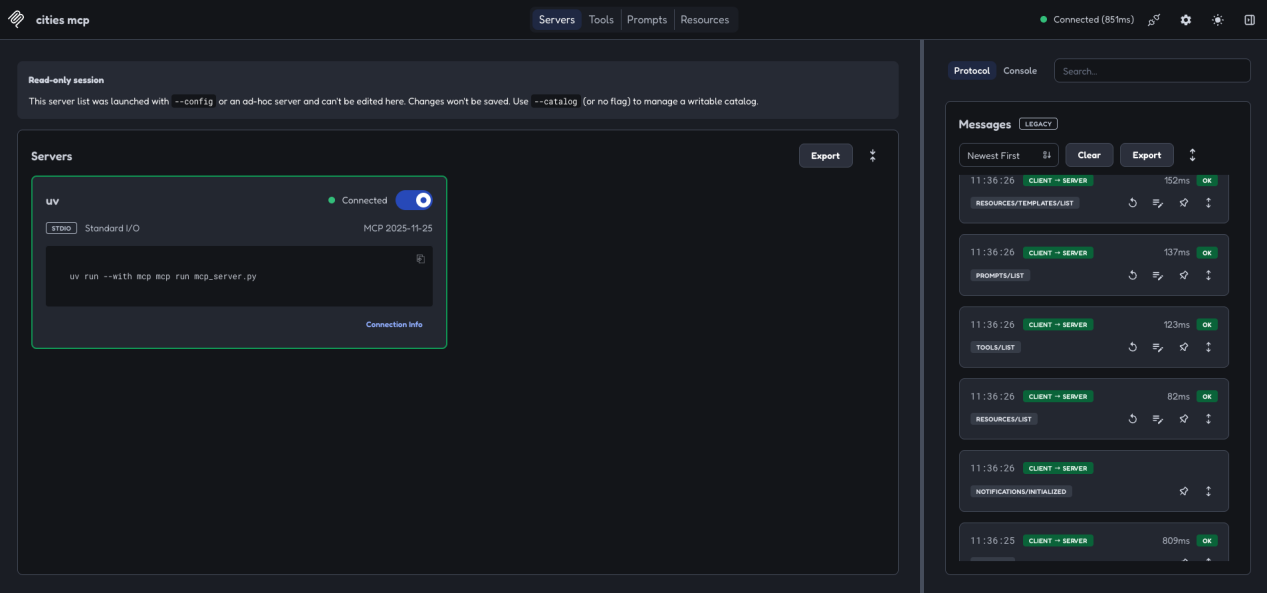
On the right side, we will see that some messages were already exchanged to get the list of resources, prompts and tools ( they are empty so far, as we know ).
Step 6: Create and add the get_city_details tool to the MCP server. Go to mcp_server.py and add the import, the region and the mcp tool.
from mcp.server.fastmcp import FastMCP
from operations import get_city_details

mcp = FastMCP("cities mcp")

#region TOOLS
mcp.tool(
    name="get_city_details",
    description="Gets the detais of a city from a country code and the city name.",
)(get_city_details)

#endregion TOOLS

if __name__ == "__main__":
    print("Running MCP server...")
    mcp.run()
Step 7: get_city_details tool is pointing to the operations.get_city_details function, which is not created yet. Lets create it. This is the code.
def get_city_details(
    country_code: str = Field(description="The country code in 2 letter"),
    city_name: str = Field(description="The city name"),):
    norm_city_name = _normalize_city_name(city_name=city_name)
    found_record = next(
        (
            item for item in _cities if item.get("City", "").lower() == norm_city_name.lower()
            and item.get("Country", "").lower() == country_code.lower()
        ),
        None
    )
    return found_record
This function receives 2 parameters: country_code and city_name. These parameters are defined as pydantic Field instances. We will need to add the following import for this definition.
from pydantic import FieldStep 8: Go back to the MCP Inspector and open the Tools separator. Our tool will be there.
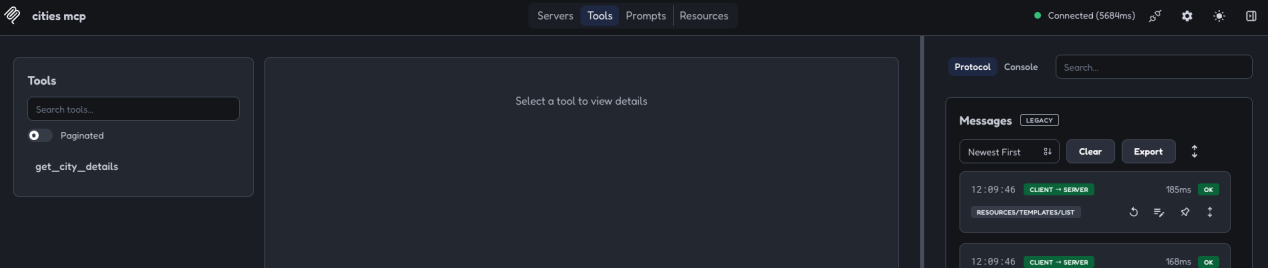
Select the tool name to run a test.
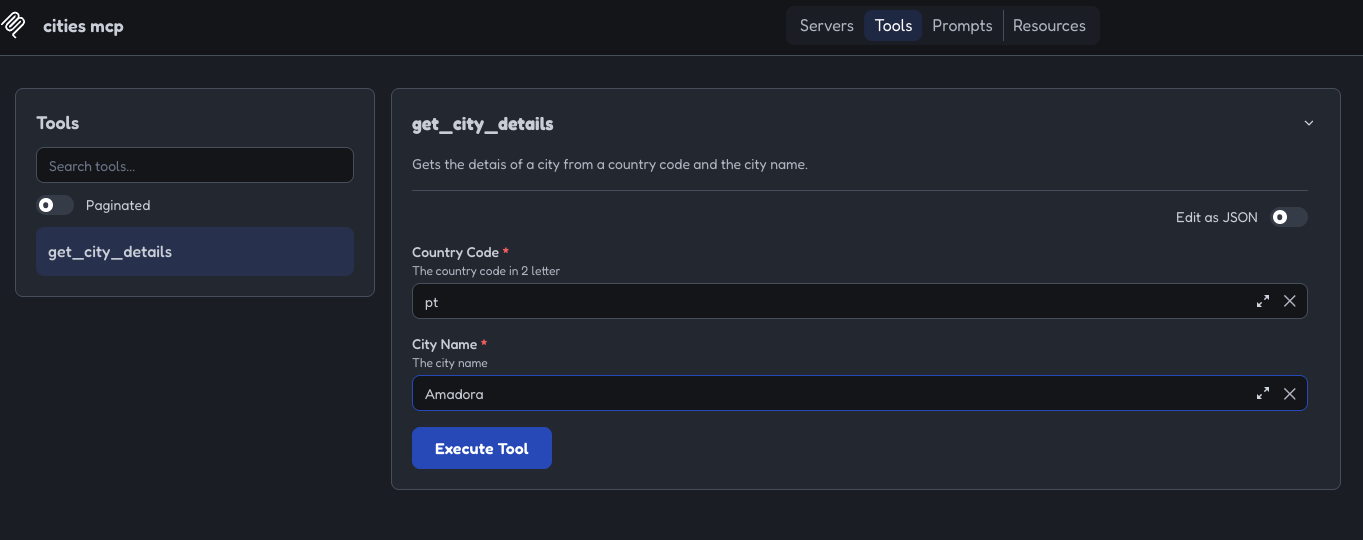
I tested with my hometown (“Amadora”) and country code (“pt”). Here are the results:
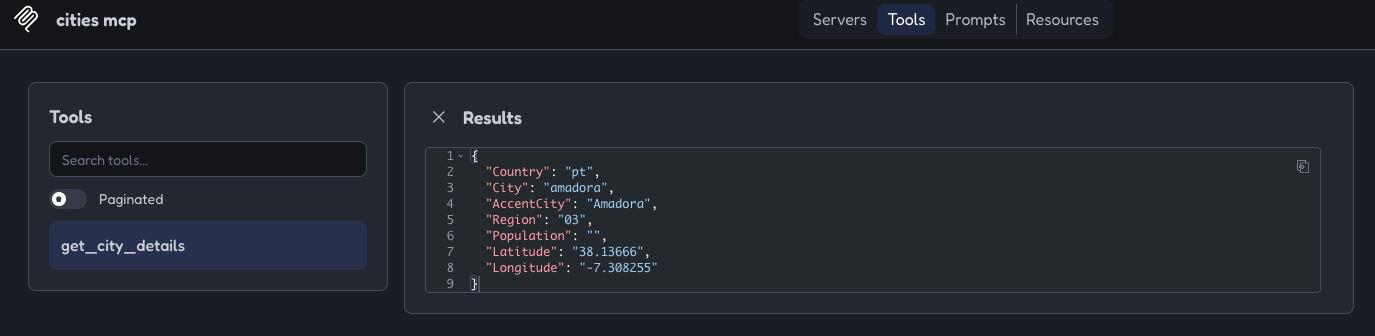
This is our first MCP server call.
Step 9: Create the get_cities_in_country MCP tool
Add the following function to operations.py.
def get_cities_in_country(
    country_code: str = Field(description="The country code in 2 letter"),):
    found_records = [item["AccentCity"] for item in _cities if item["Country"] == country_code]
    return found_records
Add the following tool to mcp_server.py.
mcp.tool(
    name="get_cities_in_country",
    description="Gets a list of the cities of a country.",
)(get_cities_in_country)
Also import the operations.get_cities_in_country function.
from operations import get_city_details, get_cities_in_countryTest it on the MCP Inspector.
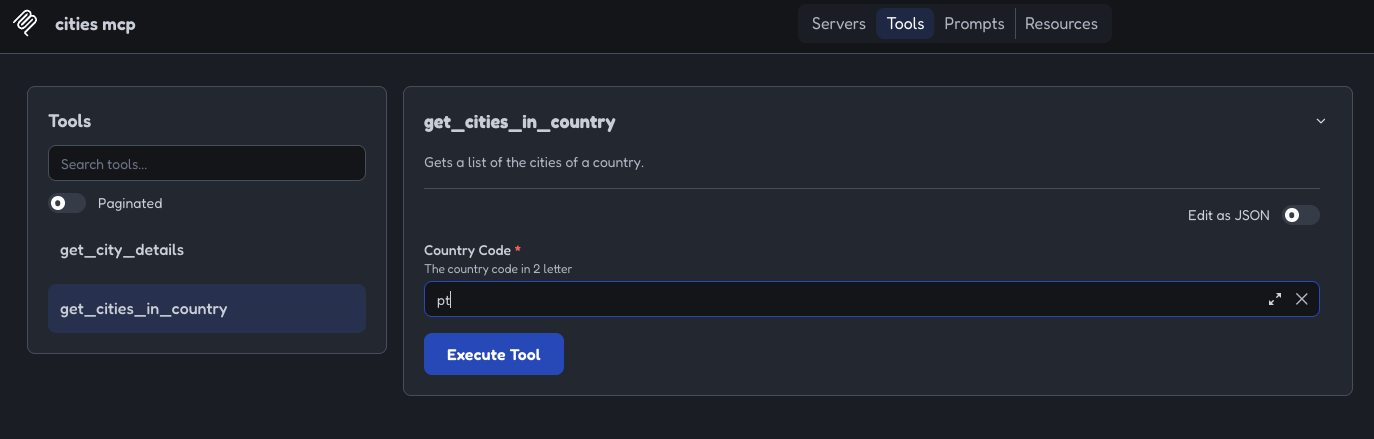
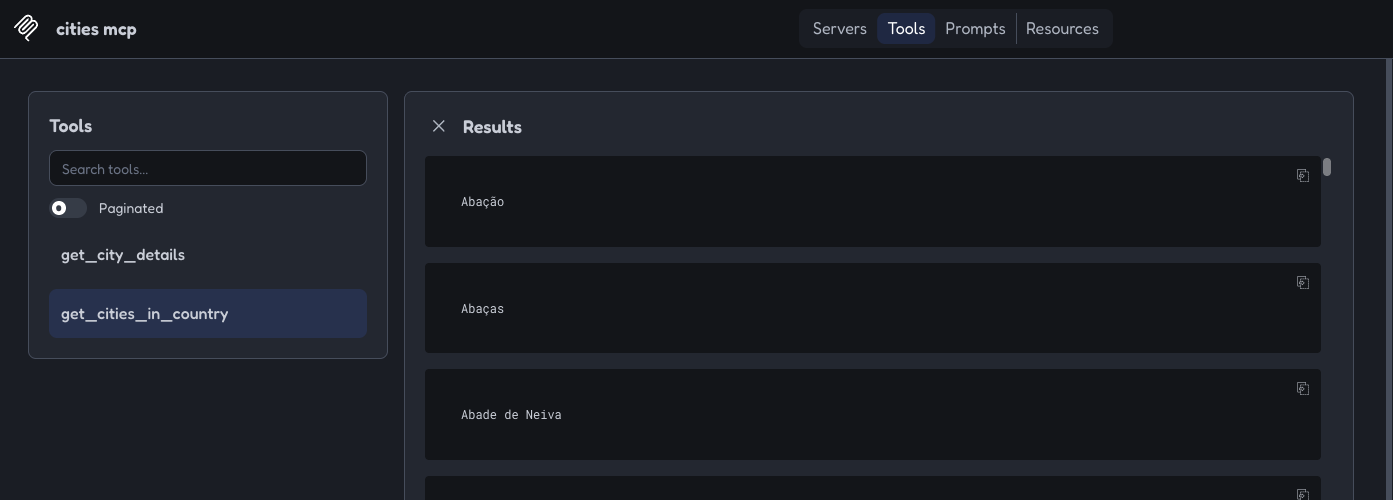
Check the results.
Pause moment: Tools vs resources vs prompts
Building with Model Context Protocol (MCP) or designing our AI application requires choosing the right primitive to maximize efficiency. Navigating these choices can be simplified with a quick decision guide based on our core objectives:
Use tools when we need to give our client app new capabilities, allowing it to execute actions, run calculations, or interact dynamically with external systems.
Here is use-case: A calculate_mortgage_payment tool.
When a user asks, "What would my monthly payment be for a €400k house?", client app calls this tool with parameters like interest rate and loan term. The tool runs the math and returns the exact calculation back to the client app.
Use resources when you need to get data into your app for UI or context, providing the model with background information, files, or live database snapshots.
Here is a use-case: A git_repository_file read-only data stream.
Our app feeds the contents of a project's README.md or a database schema directly into client app’ context window. Client app reads this data to understand the code structure before answering developer questions.
Use prompts when you want to create predefined workflows for users, establishing structured guidelines, templates, or predictable behaviors that standardize the user experience.
Here is a use-case: A code_reviewer template.
A predefined slash command (like /review) that automatically injects a structured system prompt into the chat: "You are an expert staff engineer. Review the following code snippet for security vulnerabilities and performance bottlenecks."
Hands-on part 2
Step 10: Jump to the creation of the all_countries URI resource.
First step is to get a csv file with the list of country codes and names. I got it from github datasets: https://github.com/datasets/country-list/blob/main/data.csv
The CSV file has the following format:
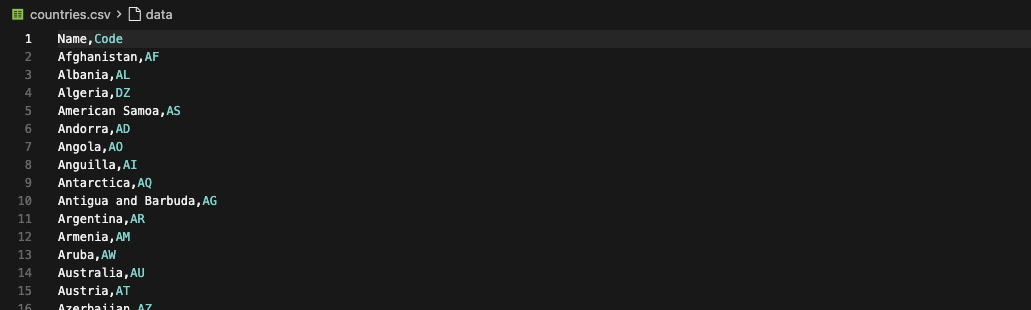
Rename it to countries.csv and add it to our project folder.
Then, add the following function to operations.py file.
def get_countries():
    _COUNTRIES_PATH = Path(__file__).with_name("countries.csv")
    try:
        with open(_COUNTRIES_PATH, "r") as f:
            _countries = f.read()
            return _countries
    except Exception as e:
        print(e)
        return ""
Lets continue, by adding the following code to mcp_server.py.
#region RESOURCES
mcp.resource(
    "cities://countries/",
    mime_type="text/csv"
)(get_countries)
#endregion RESOURCES
And update the imports
from operations import get_city_details, get_cities_in_country, get_countriesThis will add a URI resource accessible by the URI: cities://countries/
Step 11: Next, we will add the country_name template resource. Add the following function to operations.py file.
def country_name(
    country_code: str = Field(description="The country code in 2 letter"),):
    _COUNTRIES_PATH = Path(__file__).with_name("countries.csv")
    try:
        with open(_COUNTRIES_PATH, "r") as f:
            _countries = list(csv.DictReader(f))
            found_record = next(
                (
                    item for item in _countries if item.get("Code", "").lower() == country_code.lower()
                ),
                    None
            )
            return found_record["Name"]
    except Exception as e:
        print(e)
        return ""
Add this function to the imports on mcp_server.py.
from operations import get_city_details, get_cities_in_country, get_countries, country_nameAdd the following code to mcp_server.py in order to add the resource template.
mcp.resource(
    "cities://country_name/{country_code}",
    mime_type="text/plain"
)(country_name)
This resource template will be accessible by the URI:
cities://country_name/{country_code}
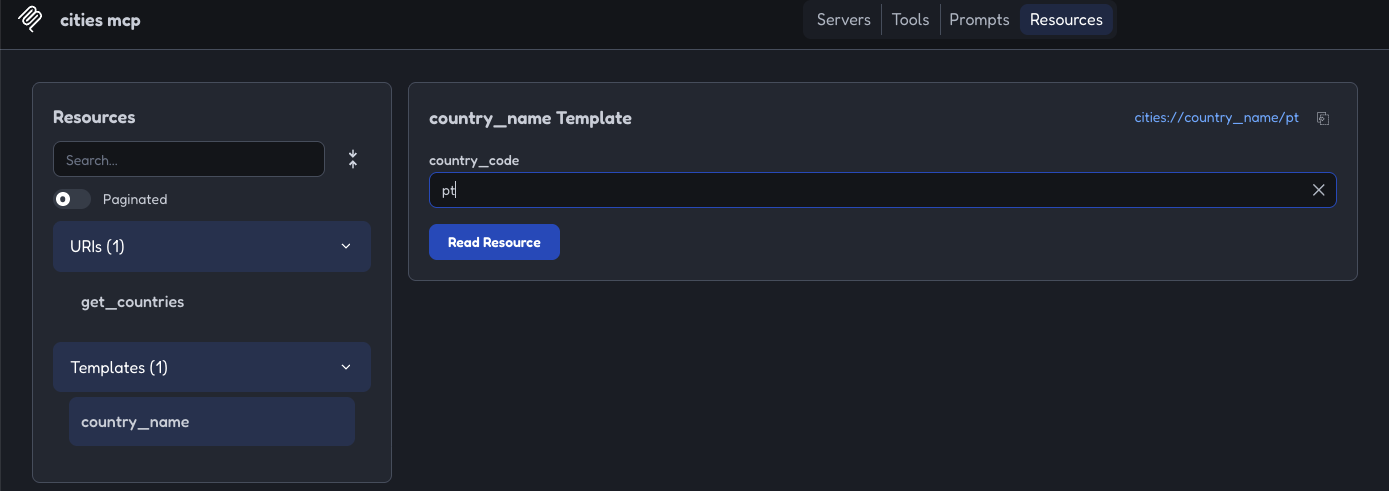
And will be expecting a the country code as a parameter on the {country_code} placeholder.
Step 12: At this time, we can see the 2 resources on the MCP Inspector.
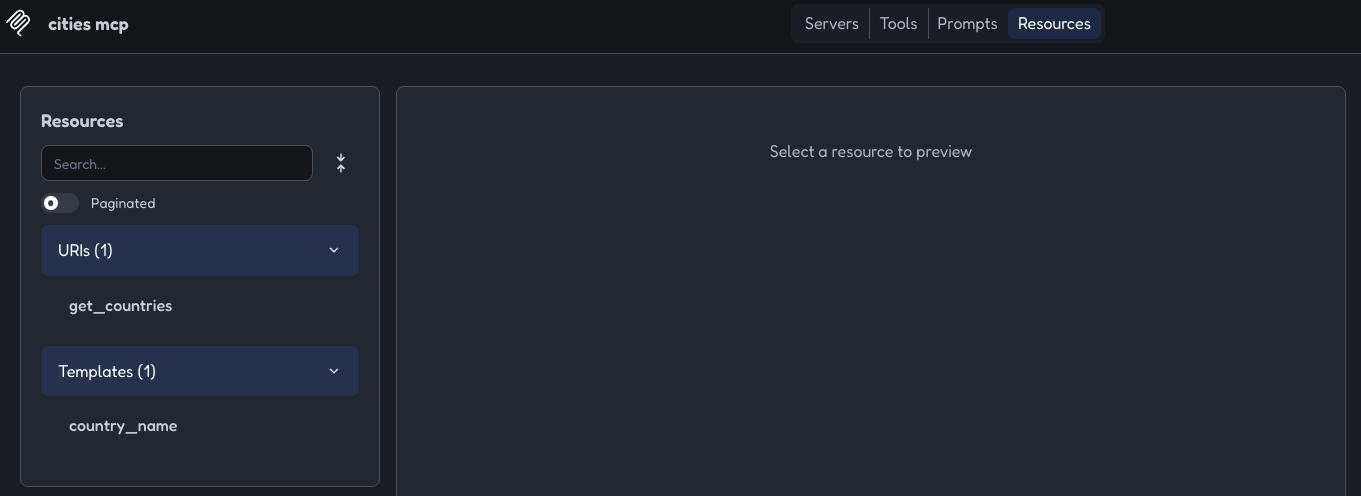
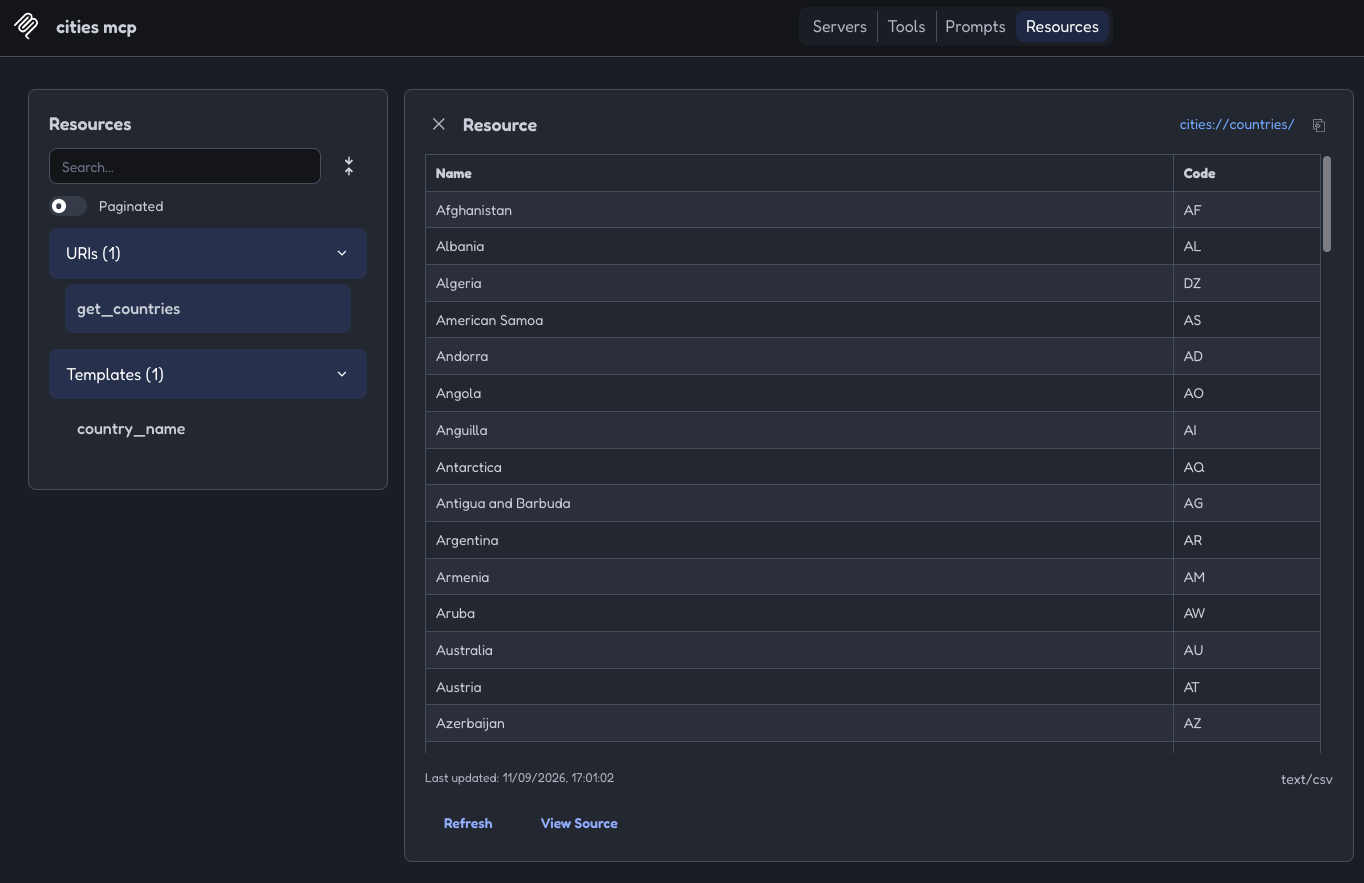
We should test them.
get_countries
country_name
Step 13: Going on the same flow, lets create now the city_details_verbose MCP prompt.
Add the following function to the operations.py file.
def get_city_details_prompt(
    city: str = Field(description="The name of the city"),
    country_code: str = Field(description="The 2-letter ISO country code (e.g., pt, us, fr)")) -> str:
    prompt = f"""
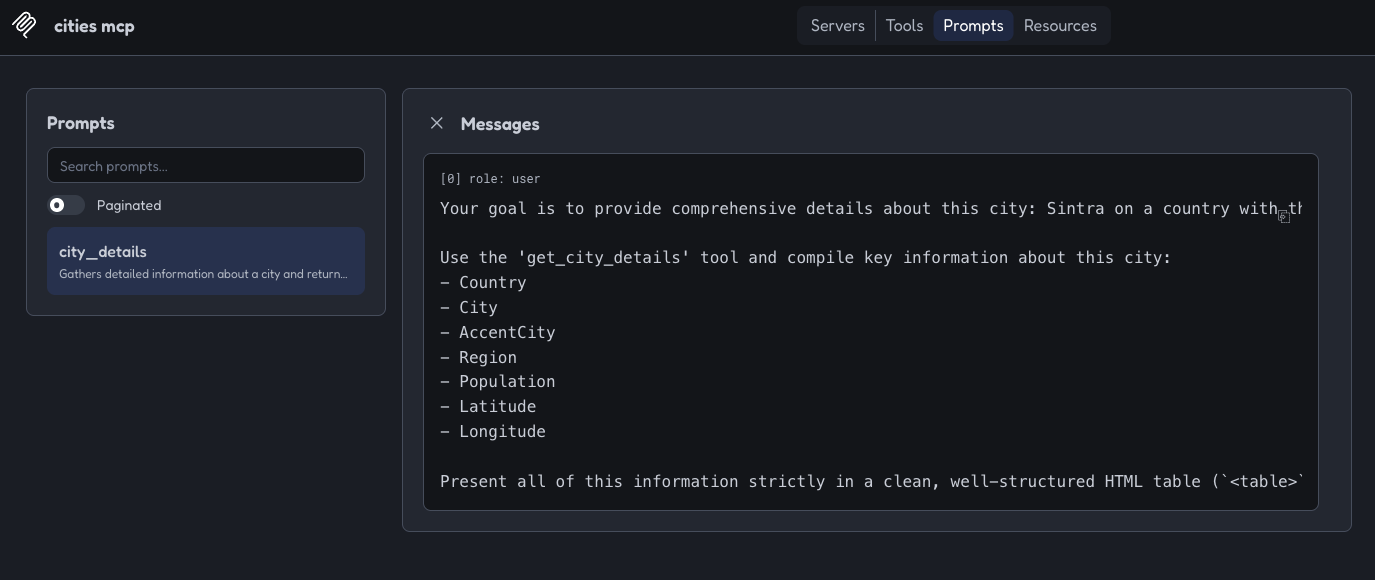
    Your goal is to provide comprehensive details about this city: {city} on a country with this Country Code: {country_code}

    Use the 'get_city_details' tool and compile key information about this city:
    - Country
    - City
    - AccentCity
    - Region
    - Population
    - Latitude
    - Longitude

    Present all of this information strictly in a clean, well-structured HTML table (`<table>`). Ensure the table is easy to read, uses proper table headers (`<th>`), and does not include any markdown styling around the HTML code.
"""

    return prompt
Add this function to the imports on mcp_server.py.
from operations import (
    get_city_details,
    get_cities_in_country,
    get_countries,
    country_name,
    get_city_details_prompt,
)
Add the following code to mcp_server.py in order to add the prompt.
#region MCP Prompts
mcp.prompt(
    name="city_details",
    description="Gathers detailed information about a city and returns it formatted in an HTML table.",
)(get_city_details_prompt)
#endregion MCP Prompts
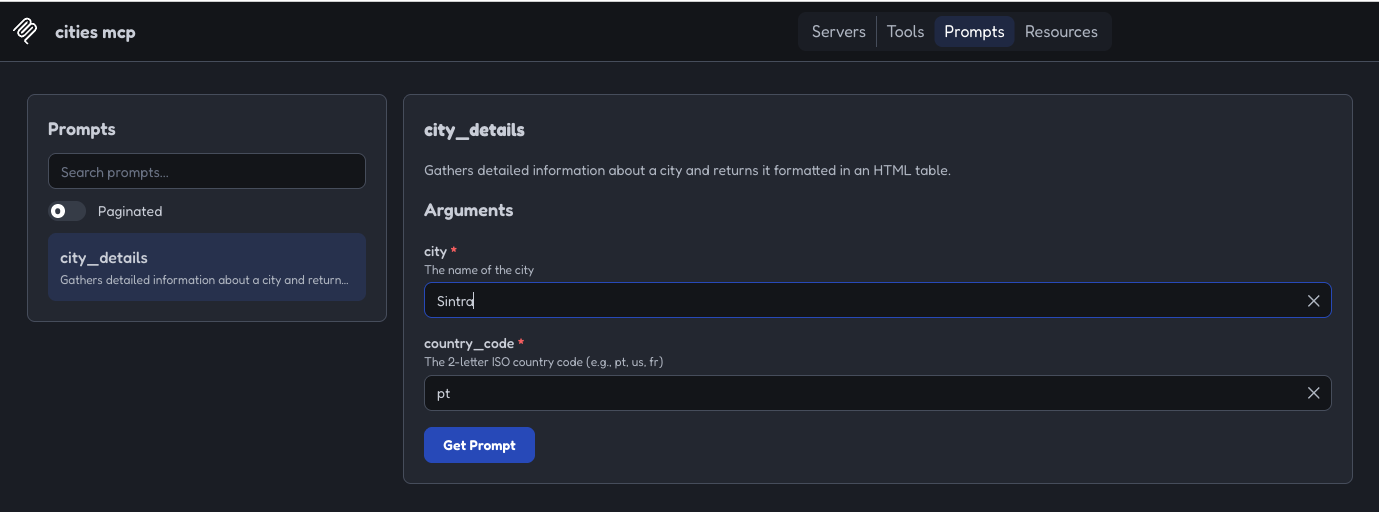
Now, test it on the MCP Inspector.
Here is the generated prompt.
Second pause: A review on what we have achieved
At this time we have:
- An MCP server running locally
- 2 MCP server tools
- 2 MCP resources ( URI and template )
- 1 MCP prompt
Now we can create a python MCP client script that interacts with the MCP server.
We need to have in mind that an MCP client interaction with an MCP server needs 3 things:
- The Connection (Transport): This is the physical or virtual basis of communication. Before any data exchange, the client needs to establish a stable transport route with the server (either locally via stdio or remotely via HTTP/SSE).
- The Session (Context): Once the connection is established, an active session is created. This is the stage where the initial handshake occurs, where the client and server negotiate capabilities, discover available tools, and establish the lifecycle of that specific interaction.
- The Command (Action): With the road built (Connection) and the rules defined (Session), the AI can finally act. The client sends specific commands—such as requesting data from a file or executing a customized tool—and the server processes them, returning the response.
Hands-on part 3
Step 14: Add the following code to the mcp_client.py file.
import asyncio
from mcp import ClientSession, StdioServerParameters
from mcp.client.stdio import stdio_client

params = StdioServerParameters(command="python", args=["mcp_server.py"])

async def main() -> None:
    # connection
    async with stdio_client(params) as (read, write):
        # session
        async with ClientSession(read, write) as session:
            await session.initialize()

            # command
            country_code = "pt"
            city_name = "Faro"
            result = await session.call_tool(
                "get_city_details",
                {"country_code": country_code, "city_name": city_name, }
            )
            result = result.content[0].text
            print(result)

asyncio.run(main())
This client will call the get_city_details tool with country_code = “pt” and city_name = “Faro”. For that we are using the session.call_tool() function.
            # command
            country_code = "pt"
            city_name = "Faro"
            result = await session.call_tool(
                "get_city_details",
                {"country_code": country_code, "city_name": city_name, }
            )
Lets run the code.
python mcp_client.py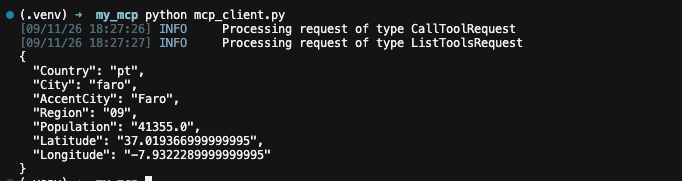
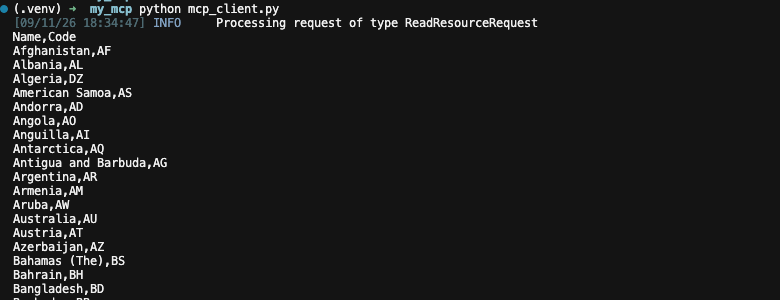
We can do the same for:
resources → session.read_resource()
            # command
            result = await session.read_resource(
                "cities://countries/",
            )
            result = result.contents[0].text
Running the code.
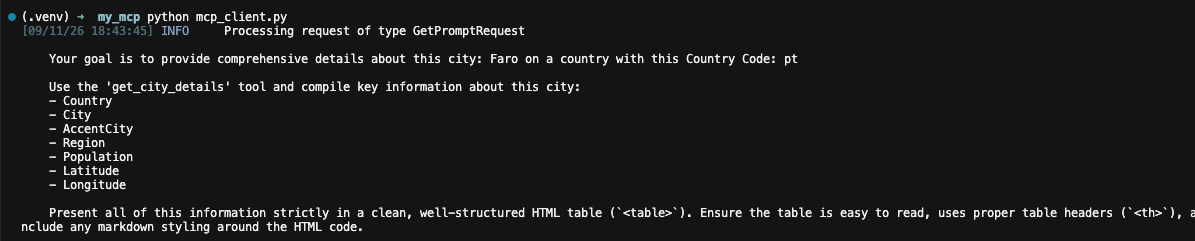
prompts → session.get_prompt()
            # command
            country_code = "pt"
            city_name = "Faro"
            result = await session.get_prompt(
                "city_details",
                {"city": city_name, "country_code": country_code, },
            )
            result = result.messages
            for message in result:
                print(message.content.text)
Running the code.
Step 15: Last, but not least, lets use this MCP on an AI client app, like Claude Code.
To do so, head to the MCP Inspector landing page and press the Export button, on the top right side.
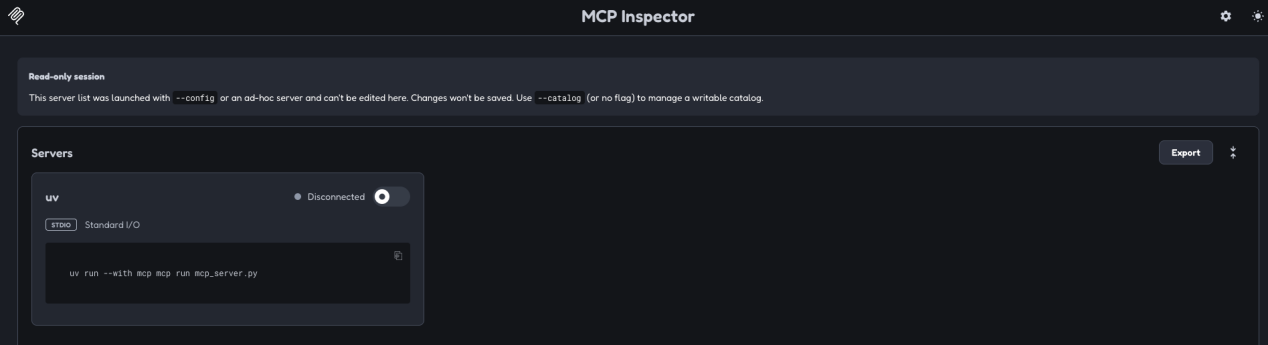
A file named mcp.json will be downloaded. Copy the file to the project folder and rename it to .mcp.json (just add the point on the beginning of the file name). Then open the file. It should look like this.
{
  "mcpServers": {
    "my_mcp_server": {
      "type": "stdio",
      "command": "uv",
      "args": [
        "run",
        "--with",
        "mcp",
        "mcp",
        "run",
        "mcp_server.py"
      ],
      "cwd": "/Users/sergioildefonso/my_mcp"
    }
  }
}
This file instructs Claude Code how to run the MCP.
Change the “uv” on the third line for a name you want to give to your MCP server ( example: my_mcp_server ).
Next, open Claude Code on the project folder. We will see a message from Claude Code stating that a new MCP server was found.

Select the “Use this MCP server” option.
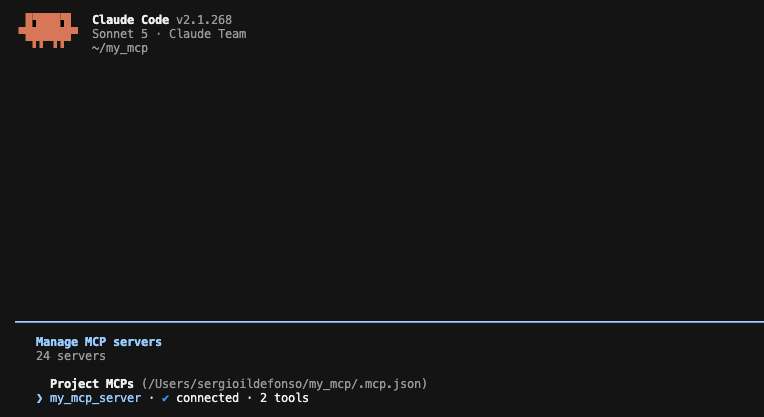
Lets write /mcp on the Claude Code command line and see the the Project MCP we created.
Lets test it.
Ask the following to Claude Code:
“get me the details of the city Amadora in country pt”
Here are the results.
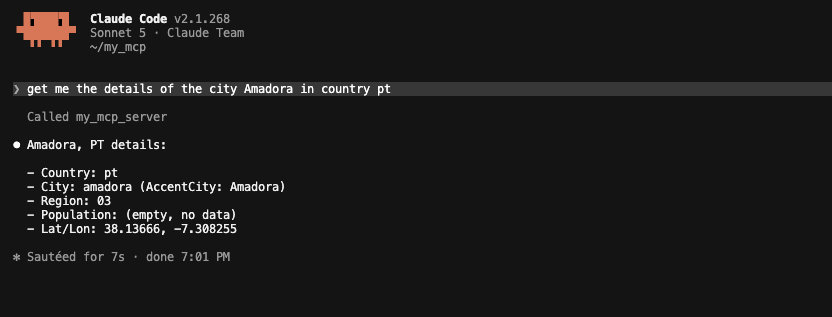
We can see that Claude Code called our MCP.
A bonus
The simple MCP server implementation we did was done with a local connection (stdio). If we want to implement a remote connection (HTTP/SSE), we should do the following changes.
Step 16: Create a new file called mcp_server_http.py. On it add the following code.
from mcp.server.fastmcp import FastMCP
from operations import (
    get_city_details,
    get_cities_in_country,
    get_countries,
    country_name,
    get_city_details_prompt,
)

mcp = FastMCP("cities mcp", host="127.0.0.1", port=8000)

# region TOOLS
mcp.tool(
    name="get_city_details",
    description="Gets the detais of a city from a country code and the city name.",
)(get_city_details)

mcp.tool(
    name="get_cities_in_country",
    description="Gets a list of the cities of a country.",
)(get_cities_in_country)
# endregion TOOLS

# region RESOURCES
mcp.resource("cities://countries/", mime_type="text/csv")(get_countries)

mcp.resource("cities://country_name/{country_code}", mime_type="text/plain")(
    country_name
)

# endregion RESOURCES

#region MCP Prompts
mcp.prompt(
    name="city_details",
    description="Gathers detailed information about a city and returns it formatted in an HTML table.",
)(get_city_details_prompt)
#endregion MCP Prompts

if __name__ == "__main__":
    print("Running MCP server on http://127.0.0.1:8000/sse ...")
    mcp.run(transport="sse")
Step 17: Create a new file called mcp_client_http.py. On it add the following code.
import asyncio
from mcp import ClientSession
from mcp.client.sse import sse_client

SERVER_URL = "http://127.0.0.1:8000/sse"

async def main() -> None:
    # connection (server must already be running: python mcp_server_http.py)
    async with sse_client(SERVER_URL) as (read, write):
        # session
        async with ClientSession(read, write) as session:
            await session.initialize()

            # command
            country_code = "pt"
            city_name = "Faro"
            result = await session.call_tool(
                "get_city_details",
                {"country_code": country_code, "city_name": city_name, }
            )
            result = result.content[0].text
            print(result)

            # command
            result = await session.read_resource(
                "cities://countries/",
            )
            result = result.contents[0].text
            print(result)

            # command
            country_code = "pt"
            city_name = "Faro"
            result = await session.get_prompt(
                "city_details",
                {"city": city_name, "country_code": country_code, },
            )
            result = result.messages
            for message in result:
                print(message.content.text)

asyncio.run(main())
As we can see, these files are clones of the local server and client files but with different connection properties:
- On the server, we define the connection url + port and configures the server to communicate over a network using Server-Sent Events (SSE) for real-time, server-to-client streaming.
- On the client, we import the
sse_clientpointing to the server url + port
In this case, the content of the .mcp.json file should be:
{
  "mcpServers": {
    "my_mcp_http_server": {
      "type": "sse",
      "url": "http://127.0.0.1:8000/sse"
    }
  }
}
That’s all
At this time we are able to create a local MCP server with tools, resources and prompts. Also we can test it and connect apps to it ( like Claude Code ) or build custom client scripts.
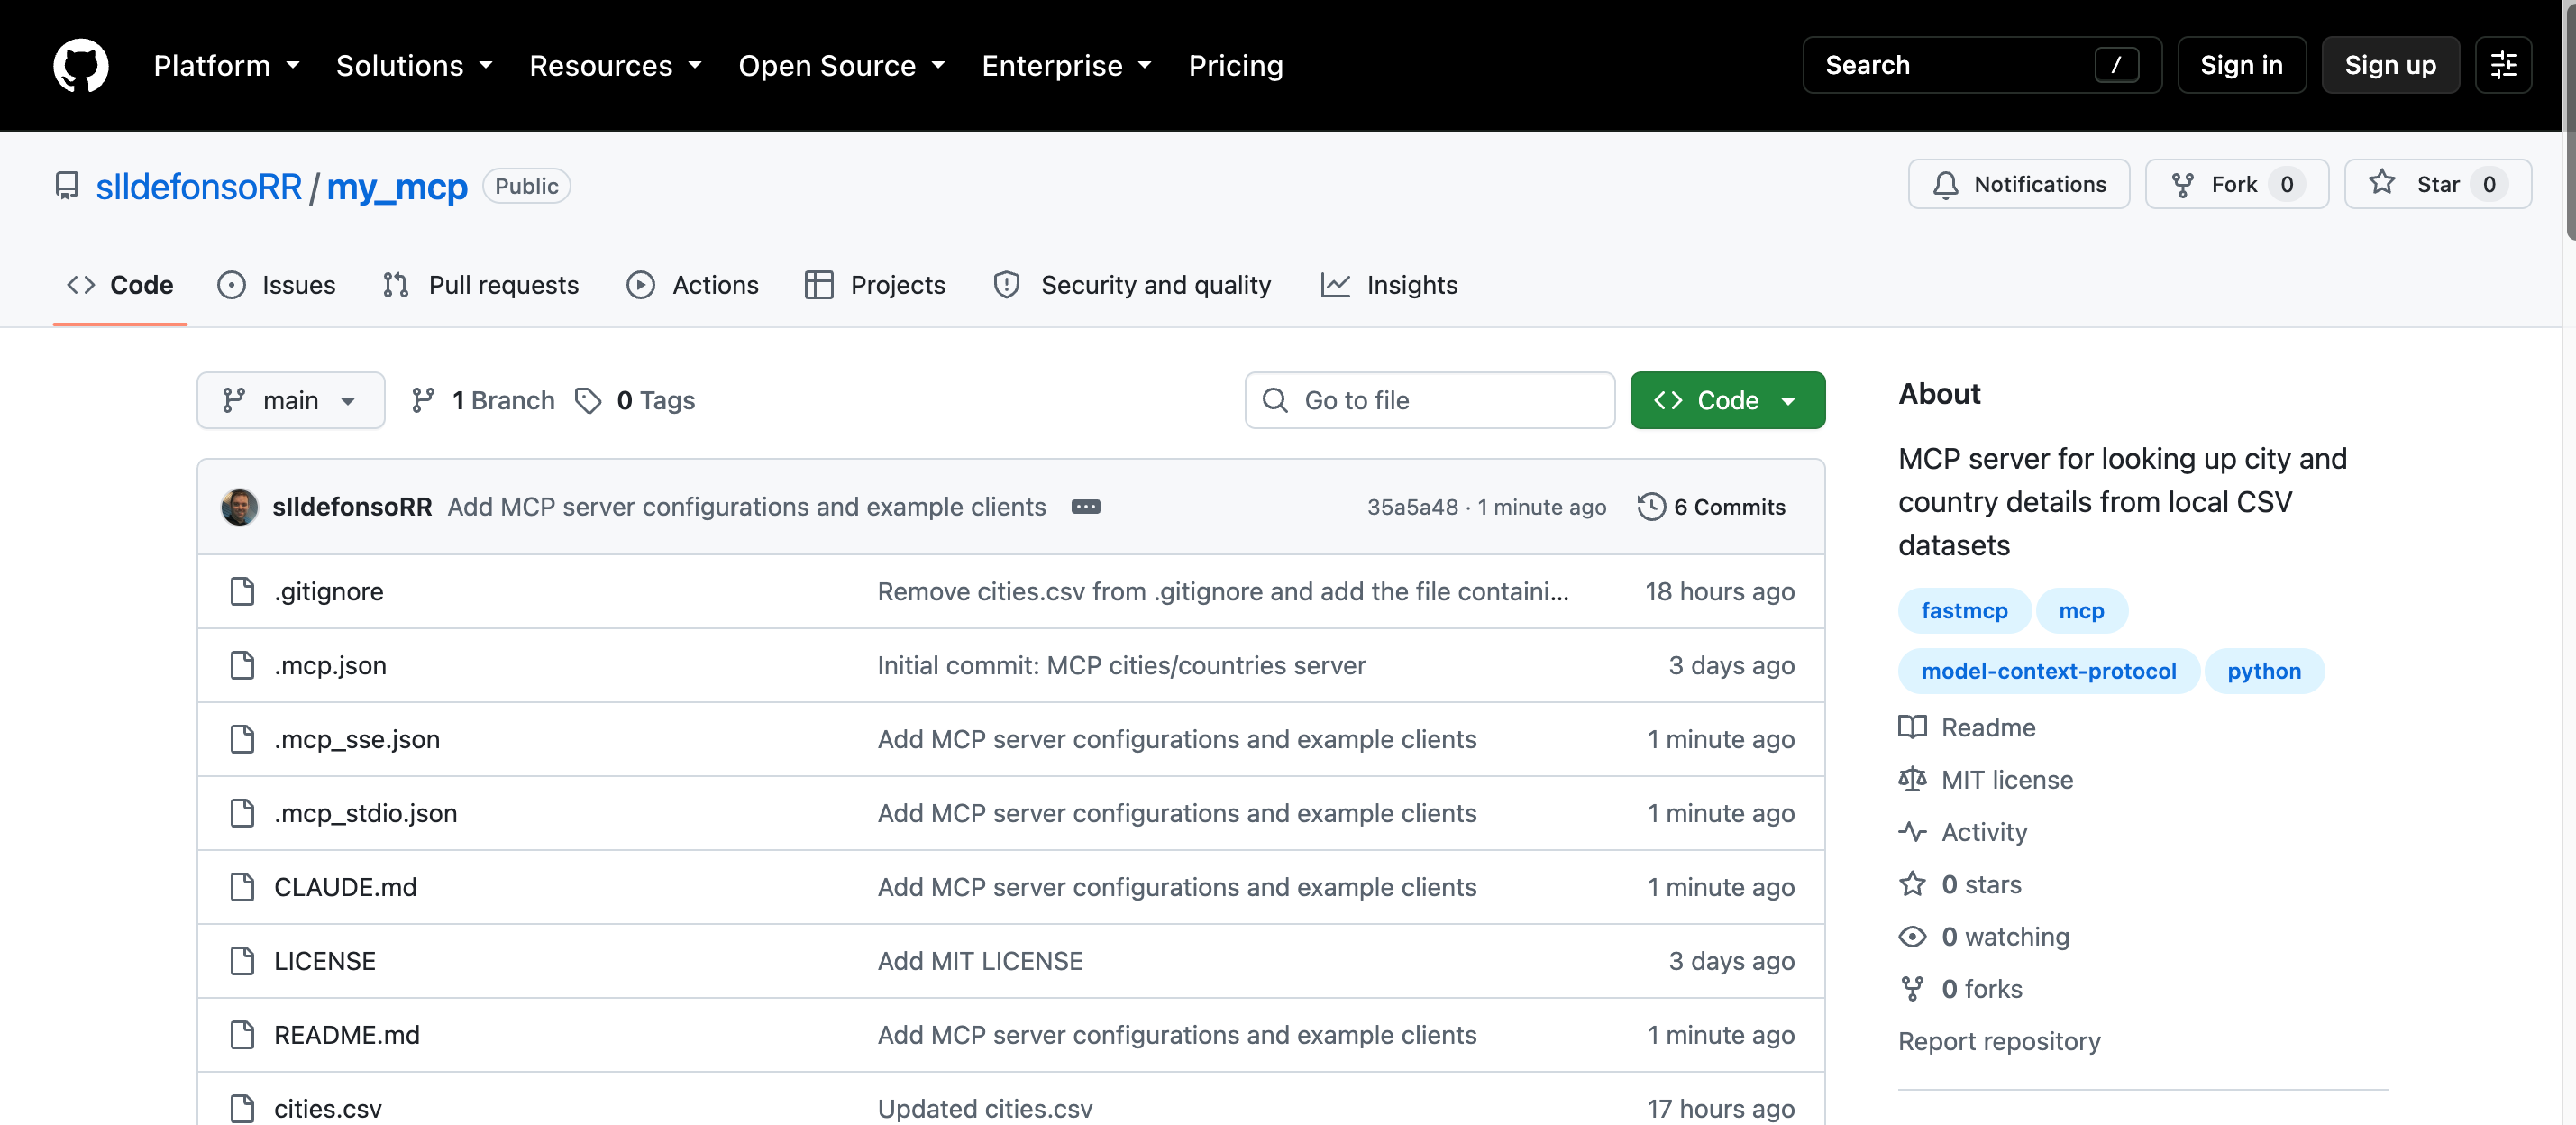
I created the following GitHub repository with the code and the files I used to create this project. It can be accessed here: https://github.com/sIldefonsoRR/my_mcp